[CO] CSV - Creation by uploading file using bulk invoices
This guide explains how to create multiple invoices at once using the Bulk Upload feature in Brinta.
Step 1 – Access Invoice Creation
- Go to Invoicing → Outgoing
- Click Create Invoice (top-right corner)
Step 2 – Select Bulk Upload and Country
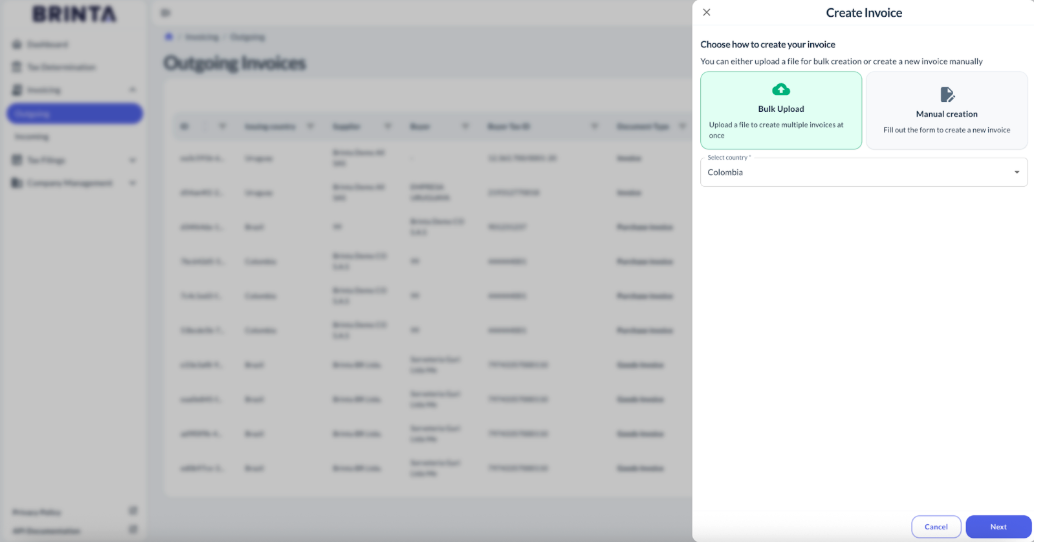
- Select Bulk Upload
- Select Country (Example: Colombia)
- Click Next
⚠️ This step is identical to manual invoice creation, except that Bulk Upload is selected instead of Manual creation.
Step 3 – Upload Template File
Download and complete the Bulk Invoice Template
- Drag and drop the completed file into the upload area
- Confirm the upload
- The file may contain one or multiple invoices.
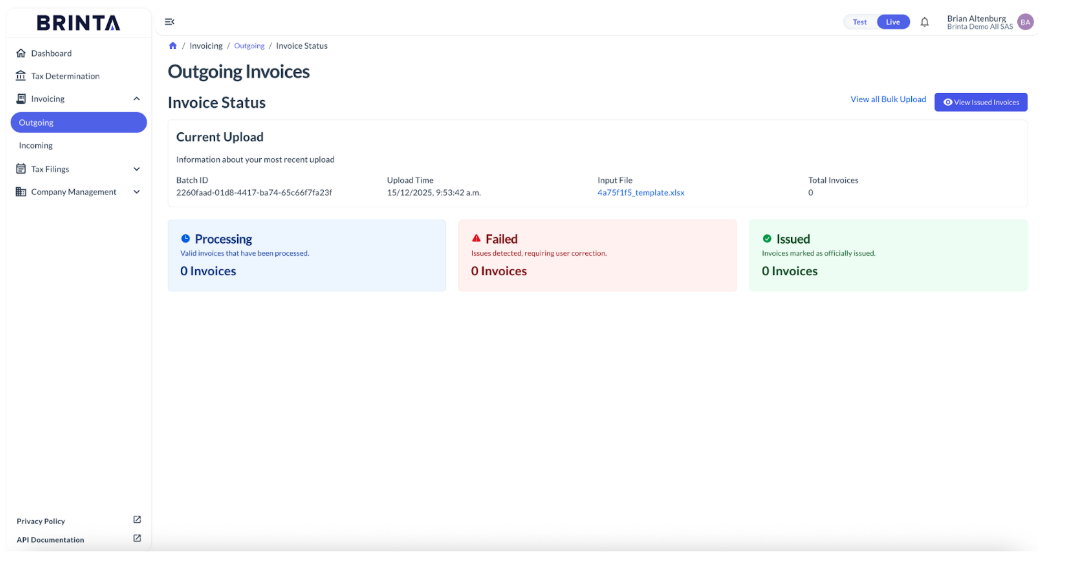
Step 4 – Bulk Upload Overview & Status
After uploading the file, you will be automatically redirected to the Bulk Overview screen.
In this view you will see:
- Issued Invoices: Invoices successfully validated and officially issued.
- Failed Invoices: Invoices rejected due to validation errors.
- Processing Invoices: Invoices still being processed.
Error Handling & Re-issue
- You can download the error report for failed invoices
- Fix the errors in the template
- Re-upload the corrected invoices to issue them again
Result
Once processed, all invoices (issued or failed) will be available in: Invoicing → Gravel → Outgoing
Each invoice will show its corresponding status:
- Created: Issued
- Received: In process to be issued
- Failed: Invoice failed.
Final Notes
- Bulk upload follows the same validation rules as manual invoices
- DIAN validations apply in the same way
- Ideal for high-volume invoicing